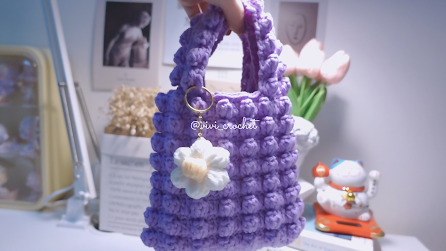
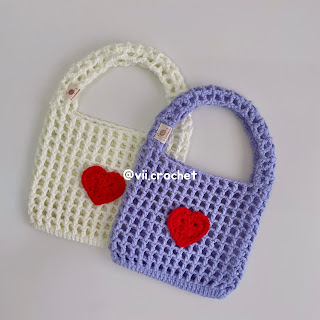
How To Crochet Heart Granny Squares Tote Bag
scissors
Needle
Yarn Details
Strand : 5ply
Fiber Content :80% Cotton 20% Fiber
Weight : 50g/roll
Yarn Diameter : 2.5mm
Suggested Needle size : 3.5mm-4.5mm
Abbreviations
- Make 1 sc into the 2nd corner
- Chain 1
- Skip 1 stitch ( 1st dc from the 3 dc )
- Make 2 sc into the next stitch ( 2nd dc from the 3 dc )
- Chain 1
- Make 2 more sc into the same stitch ( 2nd dc from the 3 dc)
- Chain 1
- Make 1 sc into the 3rd corner
- Cut the yarn tail
- insert the hook from the back ( wrong side )
- Grab the loop and bring the loop on the back
- Pull through the yarn tail into the loop
- secure the yarn
ROUND 3
*work from the bottom point of the heart
- Insert hook into back stitch of the bottom point
- Attach the white yarn
- Make 1sc 1hdc 1dc into the next 3 back stitch
- Chain 2 ( 1st corner )
- Make 1dc 1hdc into the next 2 back stitch
- Make 1 sc into the next 5 back stitch
- Chain 2 ( 2nd corner )
- Make 1 sc into the next 3 back stitch
- Make 1 hdc into the 2nd dc ( same place where the 2nd slip stitch is )
- Make 1 sc into the next 3 back stitch
- Chain 2 ( 3rd corner )
- Make 1 sc into the next 5 back stitch
- Make 1hdc 1dc into the next 2 back stitch
- Chain 2 ( 4th corner )
- Make 1dc 1hdc 1sc into the next 3 back stitch
- Make 1 sc into the bottom point again
- Slip stitch into the first sc
ROUND 4
*work in round
- Make 1dc into the next 3 stitch
- 2dc ch2 2dc into the 1st corner
- Make 1dc into the next 7 stitch
- 2dc ch2 2dc into the 2nd corner
- Make 1dc into the next 7 stitch
- 2dc ch2 2dc into the 3rd corner
- Make 1dc into the next 7 stitch
- 2dc ch2 2dc into the 4th corner
- Make 1dc into the next 4 stitch
- Slip stitch into the 1st dc
ROUND 5
- Chain 1
- Make 1sc into the next 5 stitch
- Make 2sc ch2 2sc into 1st corner
- Make 1sc into the next 11 stitch
- 2sc ch2 2sc into 2nd corner
- Make 1sc into the next 11 stitch
- 2sc ch2 2sc into 3rd corner
- Make 1sc into the next 11 stitch
- 2sc ch2 2sc into 4th corner
- Make 1sc into the next 6 stitch
- slip stitch into the first sc
ROUND 6
- Join the Granny Squares with Invisible Seam
- Take the two Squares facing right side up and place the piece together
- Insert the needle into the corner back stitch
( in the stitch that's on the wrong side of Squares )
- Insert the needle into the next back stitch and repeat the process
- Hold on to the first in and work in yarn and pull it nice and tight
- Join all the Squares with the same method
*Work on the side Part of the Bag
ROUND 7
- Insert the hook into the corner
- attach the red yarn
- Make 1sc around except the top part
ROUND 8
- Chain 1
- Turn the work over
- make 1sc into each back stitch around except the top part
ROUND 9
- Chain 1
- Turn the work over
- Make 1sc around except top part
- Cut and secure the yarn
*Combine
ROUND 10
- Take the front and back part of the bag
- place the piece together on the wrong side
- Sew in the piece together with sc except the top part
- Cut and secure the yarn
- Turn it on the right side
*Bag straps
ROUND 11
*ROW 1
- Make a slip knot
- Chain 5
- Skip 1 chain
- Make 1sc into the next 4 chain
ROW 2-90
- Chain 1
- turn the work over
- Make 1sc into the next 4 stitch
- Repeat the process into the next rows
- Cut and secure the yarn
- Sew in the bag straps
*Work on the top of the bag and straps
ROUND 12
*ROW 1
- Attach the red yarn
- Make 1sc around the top part and around the bag straps
- slip stitch
*ROW 2
- Chain 1
- Make 1sc around the top part and around the bag straps
- slip stitch, cut and secure yarn
ROUND 13
*ROW 1
- Attach the red yarn
- Make 1sc in the top middle part and the bag straps
- Slip stitch
*ROW 2
- Chain 1
- Make 1sc around the top middle part and the bag straps
- Slip stitch, cut and secure yarn
*Ruffled
ROUND 14
- Attach the white yarn into front stitch
- Chain 2 ( count as 1st dc)
- Make 3dc into each front stitch around except the top part
- on the last front stitch
( 2 dc into the same front stitch, ch 2 and slip stitch )
- Cut and secure the yarn
Check out video tutorial on my YT :)
.JPG)


thank you so much for this !!1!1!!!1
ReplyDelete